Jump to content


Photo

FAI redux

FAI

  • Please log in to reply
336 replies to this topic

#1 healey36

healey36

    Lt Colonel

  • Members
  • 737 posts
  • LocationMaryland USA

Posted 29 December 2015 - 06:16 PM

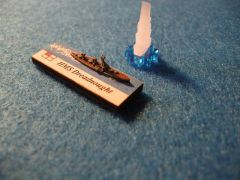
After three years away from the table, we pulled out FAI for a bit of fun.  One-on-one, HMS Dreadnought vs. SMS Nassau, somewhere in the North Sea.  Nassau scored some early long-range hits that slowed Dreadnought, but the German's guns soon fell ineffective and Dreadnought was able to effect her escape after a few lively salvos.  


I'd forgotten how much fun this is.


HMS Dreadnought


1/6000 Figurehead HMS Dreadnought, home-made base, under fire.


Healey


#2 healey36

healey36

    Lt Colonel

  • Members
  • 737 posts
  • LocationMaryland USA

Posted 01 January 2016 - 12:30 AM

A second day of action saw Moltke and Seydlitz sortie into the North Sea, met by Tiger and Queen Mary eighty NM east of the Thames estuary.  After thirty minutes of maneuver, Moltke suffered a long-range near-catastrophic hit stoving in her bridge, killing her captain along with flotilla commander Rear-Admiral Meuer.  Her executive officer was able to assume command after the damage was cleared and the ships continued to maneuver, closing to medium range.  Again this day German gunnery was poor with only superficial damage to Tiger, while Seydlitz took a terrific pounding, losing three of five primary, a third of her secondary, starboard torpedo tubes and two-and-a-half hull boxes.


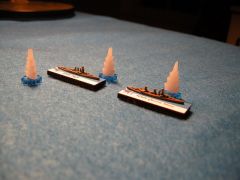
Queen Mary and Tiger bracketed by German fire:

RN BCs


After seventy-two minutes of continuous action and weather deteriorating, the Germans broke off, Seydlitz down by the bow with Moltke covering.  Rear-Admiral Meuer and 263 other officers and men were buried at sea.  The British elected to withdraw rather than pursue.


Happy New Year everyone...


Healey


#3 healey36

healey36

    Lt Colonel

  • Members
  • 737 posts
  • LocationMaryland USA

Posted 09 January 2016 - 07:13 PM

Gave the submarine rules a whirl this afternoon...HMS Welland chased a U-boat for a couple of hours, no dice.  Searching/attacking subs with the FAI/WWI rules is tough.


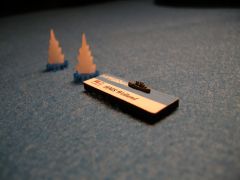
HMS Welland, a River-class DD, fruitlessly lays down a pattern in the eastern Mediterranean:

RN DD


Can't be that tough...I must be doing something wrong.  Need to reread the rules.


You can see I've done a poor job trimming Welland from her Figurehead base and filing her hull down.  A bit fiddly at this scale though...


Healey


#4 healey36

healey36

    Lt Colonel

  • Members
  • 737 posts
  • LocationMaryland USA

Posted 20 January 2016 - 07:43 PM

Welland gives up, and after a few hours hiding on the bottom, Kapitan Gercke, his crew and U-154 make good their escape:


Submarine


#5 healey36

healey36

    Lt Colonel

  • Members
  • 737 posts
  • LocationMaryland USA

Posted 01 February 2016 - 06:12 PM

Was feeling a bit "counterpane-ish" this weekend...took the Kaiser's five Braunschweig-class pre-dread battleships out for a spin. There was a report of RN cruisers operating in the area, but the Germans only found a few Brit minesweepers out trying to clear a channel. Those were handily driven off, but the Germans were just too slow to keep up with the hastily withdrawing auxilliaries. After a day's cruising the Germans returned home having burned through a sizable portion of their coal bunkers:


Braunschweig Class


Thankfully no Brit submarines in the area.


When playing GQ3 WWII actions I find it not uncommon to have numerous ships on fire during the course of battle...FAI, not so much. Why the dramatically lower fire-risk in the WWI era?


Healey


#6 pyruse

pyruse

    Private

  • Members
  • 29 posts

Posted 08 February 2016 - 09:44 AM

WW1 ships didn't have seaplanes loaded with fuel on deck, and they didn't have lots of AA guns all with nice flammable ammunition either.


#7 Cpt M

Cpt M

    Colonel

  • ODGW Retired Staff
  • 939 posts

Posted 08 February 2016 - 05:42 PM

That and later ships had far more flammable hydraulic and electrical gear. 


#8 healey36

healey36

    Lt Colonel

  • Members
  • 737 posts
  • LocationMaryland USA

Posted 08 February 2016 - 06:55 PM

Thanks for that. Another thought was that there might be some differentiation between ships powered by coal versus those powered by fuel oil. My understanding, however, is that coal could be quite volatile as well, the whole dust/spontaneous combustion thing. While fire may have been a reduced threat, catastrophic explosions certainly seemed more prevalent. There were seemingly numerous instances of ships vaporized by a "critical hit" during the Great War, while not so much twenty or so years later (excepting Hood and Barham, both of WWI vintage, or shortly thereafter).


We're working on developing a proper scenario over here, perhaps the clash Hipper sought during the raid on Yarmouth in November 1914. Beatty was closing with a battle-cruiser squadron when the German unknowingly turned away...


Draft OB:


Hipper


1st Scouting Group

SMS Seydlitz

SMS Von Der Tann

SMS Moltke

SMS Blücher


1st Scouting Group (Light-Cruiser Screen)

SMS Strassburg

SMS Kolberg

SMS Stralsund

SMS Graudenz


Beatty


1st Battlecruiser Squadron

HMS Lion

HMS Princess Royal

HMS Queen Mary

HMS New Zealand


2nd Light Cruiser Squadron

HMS Southampton

HMS Birmingham

HMS Nottingham

HMS Dublin


We're missing three or four ships from the fleets...will need to acquire those.  Expect Hipper to be on an ENE heading approximately eighty or ninety NM off Yarmouth, with contact arising from the RN on a S, SE or E heading (random determination at outset).


Healey


#9 healey36

healey36

    Lt Colonel

  • Members
  • 737 posts
  • LocationMaryland USA

Posted 24 February 2016 - 05:32 PM

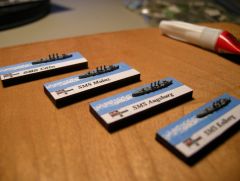
Waiting on orders from Last Square and Litko (didn't realize I'd nearly run out of bases)...used the last four I had to take care of Kolberg and her sisters:


Kolberg Class


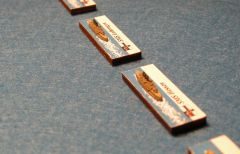
They tell me some folks put masts on 1/6000. These eyes are way too gone for that silliness.


DIW until everything comes in...temporarily moving on to other projects (basing 1/285-1/300 infantry for Mein Panzer).


Healey


#10 healey36

healey36

    Lt Colonel

  • Members
  • 737 posts
  • LocationMaryland USA

Posted 04 March 2016 - 11:36 AM

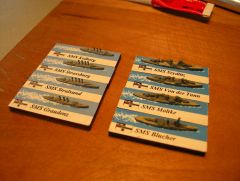
Germans are ready to go:


Hipper at Yarmouth


Brits are still waiting on an order including New Zealand, and we're going to change up the composition of their light cruiser squadron, deducting Birmingham and Nottingham and adding Chatham. Turns out I'm short of Town-class light cruisers, so we're just going to go with the three Chatham sub-class and see how it works. 


Did anyone make it up to Cold Wars? I did not this year...sigh.


Healey


#11 healey36

healey36

    Lt Colonel

  • Members
  • 737 posts
  • LocationMaryland USA

Posted 17 March 2016 - 04:49 PM

Fairfield Shipbuilding and Engineering has killed us with delays...New Zealand has yet to slide down the ways at Govans...ugh!  I need to contact the vendor and determine the cause of the hold-up...


The players are lined up, charts and tables studied ad nauseum.


Healey


Edit :: Received word from the vendor that orders have been completed and are in transit. (03/24/2016)


#12 healey36

healey36

    Lt Colonel

  • Members
  • 737 posts
  • LocationMaryland USA

Posted 25 March 2016 - 05:04 PM

New Zealand has arrived, been painted and based. The OB has been adjusted as follows:


Hipper


1st Scouting Group

SMS Seydlitz (FS)

SMS Von Der Tann

SMS Moltke

SMS Blücher


1st Scouting Group (Light-Cruiser Screen)

SMS Strassburg

SMS Kolberg

SMS Stralsund

SMS Graudenz


Beatty


1st Battlecruiser Squadron

HMS Lion (FS)

HMS Princess Royal

HMS Queen Mary

HMS New Zealand


2nd Light Cruiser Squadron

HMS Southampton

HMS Chatham

HMS Dublin


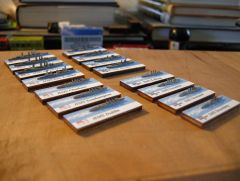
Yarmouth fleets


The scenario - Raid on Yarmouth:


03 November 1914 - Hipper leads his 1st Scouting Group on a raid intent on mining and shelling the English port of Yarmouth, supported at some distance by the High Seas Fleet with hopes of drawing a response from the British Grand Fleet. At 0740, having encountered only a minesweeper and a pair of old destroyers which are hastily driven off, Hipper's light-cruisers sow their mines and together with the battle-cruisers deliver a few poorly-aimed shells onto the beach and into the port and town proper. Disappointed not to have encountered heavier units, Hipper continues north, then turns east-north-east on a long arcing course, heading for home.

The Grand Fleet, having just received word of its defeat at Coronel some two days earlier, is in some level of disarray. However, Beatty and his battle-cruisers, keen on restoring a bit of order and receiving word of the German action off the southeastern English coast, are dispatched with a slightly earlier departure time than he'd had historically and together with Hipper's farther northern arc, allows for the chance of interception. Other elements of the Grand Fleet, based in Ireland, are far behind, and the shadowing High Seas Fleet has already turned for home.


It would seem an outside chance, but then at 1235 Hipper, standing on the bridge of Seydlitz, receives a message from Moltke of smoke off their starboard-quarter closing from the northwest...


Healey


#13 healey36

healey36

    Lt Colonel

  • Members
  • 737 posts
  • LocationMaryland USA

Posted 04 April 2016 - 06:55 AM

Play is delayed until later this month due to scheduling conflicts. The first run-through probably happens last weekend in April.


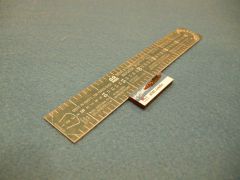
Seemed to have misplaced my turn-gauges. Printed/mounted a few ruler/turn-gauges from the ODGW web-site:


GQIII gauge


These should work fine for 1/6000. I laminated them with a clear film which dulls down the color a bit in the photograph.


Captain Halsey of New Zealand has his Maori war skirt on...can't wait to come to grips with the enemy.


Healey


#14 healey36

healey36

    Lt Colonel

  • Members
  • 737 posts
  • LocationMaryland USA

Posted 21 April 2016 - 03:40 PM

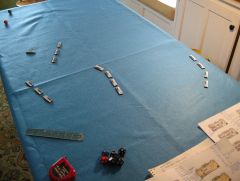
So we had the first run-through of our Yarmouth Raid scenario, and the main thing I learned was we're still rusty on the rules. Lots of time spent consulting the rule-book, causing us to run long past our time-limit. Due to some very tight space we adjusted the scale by half, which caused action to look like it was at point-blank ranges occasionally. Still we had some fun and vowed to give it another go soon.


Clear weather with a stiff breeze had the North Sea at a good Force-5 chop, precluding the use of casement weapons and hampering long-distance visibility at deck-level.


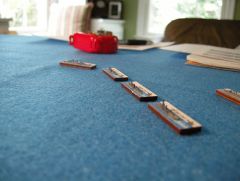
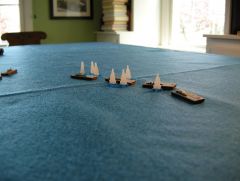
Moltke's sharp-eyed spotter provided Admiral Hipper with more than enough time to get his fleet around into a favorable position, but poor maneuvering resulted in the light-cruiser screen being out of position for much of the first half-hour. As Beatty closed from the northwest Hipper directed a course change to the northeast and increased speed.


Yarmouth f

German battlecruisers turn northeast in the opening minutes.


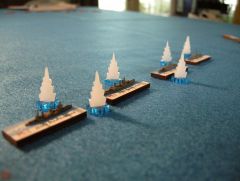
Beatty continued southeastward intent on cutting off Hipper's line of withdrawal and possible relief from the main-body. At 1302 Moltke opens on Lion at long range without result. Six minutes later, altering her fire onto Princess Royal, Moltke lands a hit resulting in minor damage.


Thus begins a twenty minute period with both lines exchanging fire at extended range. At 1314 Hipper again changes course to head due north.


Yarmouth e

Beatty's battlecruisers bracketed by long-range fire (the German battle-line can be seen in the distance to the far left).


At 1326 Moltke scores a second hit on Princess Royal, reducing her maximum speed to 25 knots. Hipper alters course again, now heading northwest to begin closing on Beatty. At 1332 Von Der Tann scores a hit on Queen Mary knocking her speed down to 25 knots maximum. The British battlecruisers suffer poor shooting (that D20 dice requirement for the British BC's proves highly-diluting at long range).


At 1344 near-disaster strikes as Von der Tann delivers four rounds onto Lion, Beatty's flagship. One hit takes out her forward turrets and penetrates below decks. Chatfield's order to immediately flood the forward magazine saves the ship from catastrophe, but this and two other hits to the forecastle results in flooding that has her down by the bow and dropping out of the line. Admiral Beatty watches despondently as the others steam past.


With Lion withdrawing to the south Princess Royal takes over at the head of the British column, followed by Queen Mary and New Zealand. Six minutes after Lion is nearly destroyed, New Zealand lands a blow on Seydlitz, penetrating her double 3" deck amidships, wrecking her after engine-room. Seydlitz's current speed of 18 knots becomes her best possible.


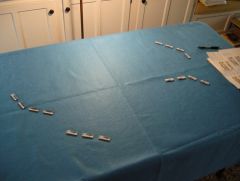
Yarmouth d

A top-side view of the action. Here Hipper's battlecruisers are in the upper right as the German light-cruisers turn inside to make a run at the British battleline on the left.


With the range closing fast, Queen Mary scores two hits on Von der Tann, the first reducing her forward boiler-room to a shambles and the second knocking out her fire-control system. Von der Tann's speed drops to a 17 knot maximum as she continues on. Seconds later New Zealand finds Seydlitz again, this time aft of her conning tower just ahead of the funnel, disabling her fire-control as well.


With the British light-cruiser screen not in position to fend them off, the German light-cruisers strike off toward the British battlecruisers, closing for a possible torpedo attack. Beatty's larger Town-class cruisers, recognizing the threat, desperately attempt to intercept.


Yarmouth c

The German light-cruisers can be seen here in the center of the photo beginning their run at the three British battlecruisers. Lion is seen limping off to the south.


Hipper's battlecruisers, despite having closed to less than 12,000 yards, find their aim (and luck) has departed. At 1356 Seydlitz finds New Zealand but the damage is minor. It would be their final hit on the British battleline.


The British battlecruisers and light-cruisers have turned their attention to the bull-rushing German light-cruisers. Strassburg and Stralsund suffer multiple hits but continue forward. At 1402 Strassburg suffers a further three hits, one taking out her forward mount and penetrating below decks. Flooding of the forward magazine prevents disaster and she continues on. Stralsund, holed repeatedly, fails her morale check and drops out of the line turning north, nearly colliding with the overtaking Kolberg.


Yarmouth b

German light-cruisers pass through a murderous barrage to launch their torpedoes.


At 1414 Hipper gives the order to break off. The German light-cruisers, having passed through the maelstrom, launch their torpedoes and turn north for the protection of the heavier battlecruisers (the German player blundered badly here, not understanding that the CL's submerged tubes were broadside-mounted, not forward-mounted...the correcting maneuver together with the fact that they are only single-mounts reduced the potential effectiveness to near nothing). For their part the British turn south, then southeast evading the few torpedoes launched by the Germans. With the intervening distance rapidly expanding, the action comes to an end.


Had the day continued Stralsund would almost certainly have been destroyed, her speed down to just six knots and heavily damaged. She would face up to a year in the yard, or possibly scrapping outright. Lion would be out of action for months, as would Strassburg. Seydlitz and Von der Tann would be laid up for a few weeks while their fire-direction systems were repaired. Osmond Brock and Princess Royal had given a good accounting, as did Halsey's New Zealand. Moltke escaped nearly unscathed, while Blucher and Queen Mary had shot poorly. Struggling to find position throughout the battle, 2nd Light Cruiser Squadron Commander William Goodenough had proven not to be. In the end he was manhandled by Hipper's CL's, and his flagship Southampton would limp home with sisters Chatham and Dublin, The light-cruisers on both sides had, however, proven quite durable in the face of heavy fire.


No decisive victory here for either force, perhaps a slight tip to the British. Beatty, outraged at the poor gunnery of his BC's, will have heads rolling. The Kaiser recommends Hipper for a medal which he refuses.   


In the post-game debrief there is a sense that we have left out a lot, inviting a careful reread of the rules and examples. The torpedo (sequencing and tracking) and damage-control (what can be repaired and when) sections require further familiarity. We need to build a bigger table (or move to the driveway), and we need to scrounge up a few more D20's for those poor-ranging Brit BC's. As always, the action feels incredibly condensed in these games, the entire engagement consuming just ninety-nine scale minutes.


In the end we wonder if it is really possible to be just a casual player. I for one think not.


Healey 


#15 healey36

healey36

    Lt Colonel

  • Members
  • 737 posts
  • LocationMaryland USA

Posted 12 May 2016 - 12:20 PM

Planning a replay of the Yarmouth scenario, this time with fog (as was encountered historically along the coast) and using an umpire. Should make for shorter ranges, presuming anybody finds anybody.


Need to take another stab at basing some destroyers/torpedo boats. I'd like to keep the basing consistent but it's difficult as Figurehead casts the 1/6000 DD's directly onto the metal base, not separately as with the larger classes. It's not difficult to cut them off the base using a pair of nail-clippers, but filing the hull down to a respectable profile is tough. Considering their deployment in "shoals" the task is daunting...patience is probably the answer, of which I have little.


Sounds like a project to detail "on the workbench".  


Healey


#16 healey36

healey36

    Lt Colonel

  • Members
  • 737 posts
  • LocationMaryland USA

Posted 25 May 2016 - 11:42 AM

While waiting to reconvene for another run at Yarmouth, we have begun development of scenario(s) centered around the actions of August 19, 1916, one of Scheer's post-Jutland follies. Intended as a luring raid on Sunderland, this one would be quite a bit more extensive (compared to Yarmouth) as it involved both fleets (less the losses from Jutland), a sizable U-boat screen, a number of British submarines, Zeppelins and potentially a British seaplane carrier. That's a lot to bite off, so we may focus initially on the lead elements, Hipper with two battlecruisers and three "fast" battleships vs. Beatty and six battlecruisers. Given the experience with the Yarmouth scenario, this might prove terribly one-sided (in favor of the Germans), but we need to find a decent OB for the action.


Historically Scheer's plan was well-developed, and had he not acted on faulty intel and turned to meet a vaporous enemy reportedly approaching from the south he would have surely collided with Jellicoe's force, estimated to be just 42 miles away. Now, after a couple hours on the new course and encountering nothing, it was too late in the day to return to the original course for Sunderland, so Scheer turned east-southeast and headed for home.


With no further success versus Scheer after Jutland (there is considerable debate whether Jutland was a success) Jellicoe was relieved of command of the Grand Fleet in November 1916 and elevated to First Sea Lord replacing Henry Jackson. The aggressive, self-promoting Beatty would be appointed to command the Grand Fleet, replacing the more cautious Jellicoe. Always eager to come to grips with the enemy, Beatty would find himself sorely disappointed for the remainder of the war.


Perhaps a good showing on August 19 would have saved Jellicoe from this fate.


HMS Engadine 1916

Seaplane tender HMS Engadine transferred to Beatty's battlecruiser force in 1915. In action at Jutland and thereafter until transferred to the Med late in the war. Returned to private ownership after decommissioning, had a long commercial career before being tragically lost off Manila in 1941. 


Short 184


The Short 184...


Healey


#17 simanton

simanton

    Lieutenant

  • Members
  • 211 posts

Posted 29 May 2016 - 09:54 PM

Recommend you look at the "floating tables" concept we use at Tactical Solutions. Pix in several of the AARs I've posted. It practically guarantees there will be navigable water where you need it when you need it. NICE AARs and pix!

#18 healey36

healey36

    Lt Colonel

  • Members
  • 737 posts
  • LocationMaryland USA

Posted 01 June 2016 - 07:35 AM

The "floating tables" concept looks to be a good one and goes a long way toward solving the problem of insufficient real-estate. We use a similar concept by having a very large table-cover with the idea we can scroll it in various directions moving the "area-in-play" as the action moves. The mistake we made is not using more than a single 30" x 72" table underneath. I have a tendency to underestimate the space required for these sessions. I think if we double the number of underlying tables, or certainly if we triple that and still have the ability to scroll the surface we should be okay at the 1/6000 scale. To accommodate we'll have to move the furniture around in my "office", but that's certainly do-able.


Years ago we built a geomorphic system for playing the old Command Decision rules in 1/285 scale. We had a large number of foot-square modules that we could assemble on the table(s) and if the action moved to the edge we could simply add/subtract modules to keep things centralized. It worked well. We're hoping to make use of those again when we get around to getting sorted on MP.


Returning to these games has been an interesting exercise.


#19 healey36

healey36

    Lt Colonel

  • Members
  • 737 posts
  • LocationMaryland USA

Posted 11 June 2016 - 08:13 PM

Haven't found a good OB for Beatty's six battlecruisers for the August action. If one presumes 1st and 2nd Battlecruiser Squadrons it works out to the correct number of ships. 1st Squadron would be just Princess Royal and Tiger (Queen Mary had been sunk at Jutland and Lion was still laid up for repairs). 2nd Squadron would be comprised of Australia, New Zealand, Inflexible and Indomitable (of course we have no Invincible-class BC's in inventory, so an order will have to go off). The math works, so until we find better info we'll go with this.


The question of supporting ships is a mystery. Presumably more CL's and shoals of DD's...ugh...


The German bombardment group was comprised of BC's Moltke and Von der Tann and BB's Bayern, Markgraf and Grosser Kurfurst. To improve the likelihood of bringing the rest of the High Seas Fleet to bear, Scheer intended to have the main-body follow at a distance of just twenty miles.


#20 Doug Barker

Doug Barker

    Private

  • Members
  • 23 posts

Posted 14 June 2016 - 09:27 PM

Avalanche Press has an operational scenario in their Great War At Sea - Jutland game covering the Aug 1916 action. They seem to have done a good amount of research for putting their scenarios together with more of an emphasis on historicity than play balance.  Per their setup instructions the following were based at Rosyth with the RN BC force:


BCs: Inflexible, New Zealand, Lion (minus a turret), Tiger, Princess Royal, Australia

CLs: Gloucester, Falmouth, Dublin, Southampton, Birmingham, Galatea, Phaeton, Inconstant, Cordelia (as refitted in 1915), Birkenhead, Chester

DDs: 16 * Admiralty class


The following are set up with Hipper on their way to Sunderland:


BBs: Grosser Kurfurst, Markgraf, Bayern

BCs: Von der Tann, Moltke

CLs: Munchen, Stuttgart, Stettin, Pillau, Frankfurt, Hamburg

DDs: 9 * V25 class, 13 * S49 class


Based on the orders of battle the best play balance is a clash between the BC forces... the two main battle fleets have a distribution of:


BBs: 15 German vs 27 British

ACs: 0 German vs 4 British

CLs: 2 German vs 3 British

CSs: 0 German vs 4 British

DDs: 17 German vs 46 British

TBs: 22 German vs 0 British


This doesn't include forces at Cromarty (2 BBs and 1 AC), Harwich (5 CLs and 19 DDs) and Sheerness (1 BB, 5 B, 8 DD)


Also tagged with one or more of these keywords: FAI

0 user(s) are reading this topic

0 members, 0 guests, 0 anonymous users