Jump to content


Photo

Road To The Bridge


  • Please log in to reply
5 replies to this topic

#1 Begemot_

Begemot_

    Private

  • Members
  • 48 posts

Posted 02 July 2020 - 02:27 PM

Road To The Bridge


France in August 1944. The German army is retreating across France with the Allies in hot pursuit. This AAR covers a fictional delaying action by a German rearguard against an American task force.


Situation

The German rear guard needs to delay the Americans long enough for German engineers to prepare an off table bridge for demolition (15 game turns). The Americans are to seize this bridge intact, if possible, therefore they need to cross the game table before the Germans have completed their preparations. Unknown to the American player a broken down Tiger II sits along the road they are advancing on. The Germans are feverishly trying to get it running so it can drive off the table and avoid capture.


Weather

Conditions are dry with low overcast and light wind. There is no US air cover because of the clouds.


Rules

Mein Panzer


The Germans

49834500278_113e05de62_o.jpg


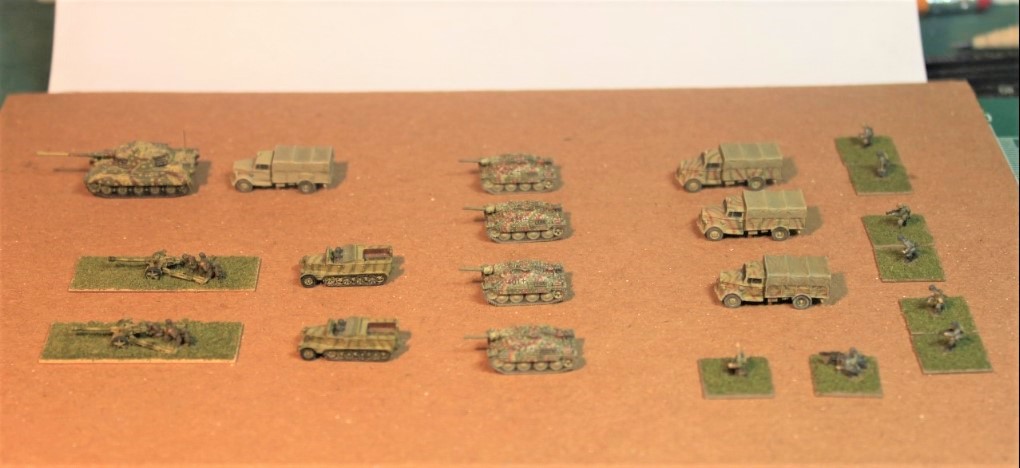
The Germans have two 75 AT guns, four Hetzers and one infantry platoon with trucks as the rear guard. The disabled Tiger and a truck with mechanics is in the upper left. An off board battery of 105mm artillery is available with limited HE and smoke support.


The Americans

49834500293_19d8ed7073_o.jpg


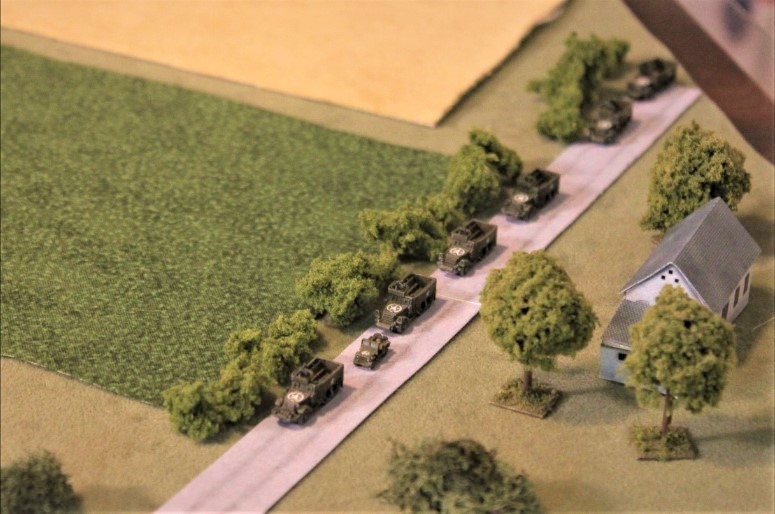
The Americans have three Grayhound scouts, three Shermans, three Wolverine tank destroyers, a Forward Observer (jeep) from a dedicated off board 105 mm artillery battery, and two infantry platoons mounted in halftracks.


The Ground

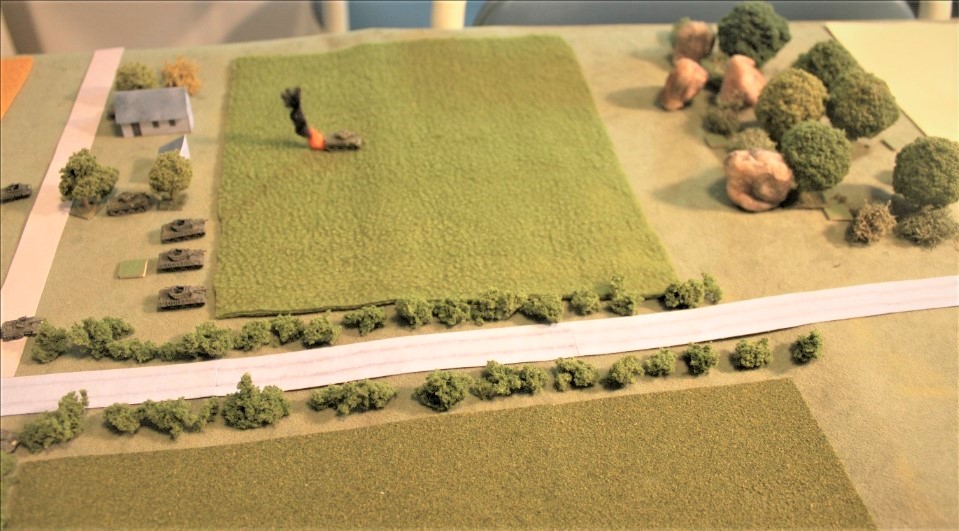
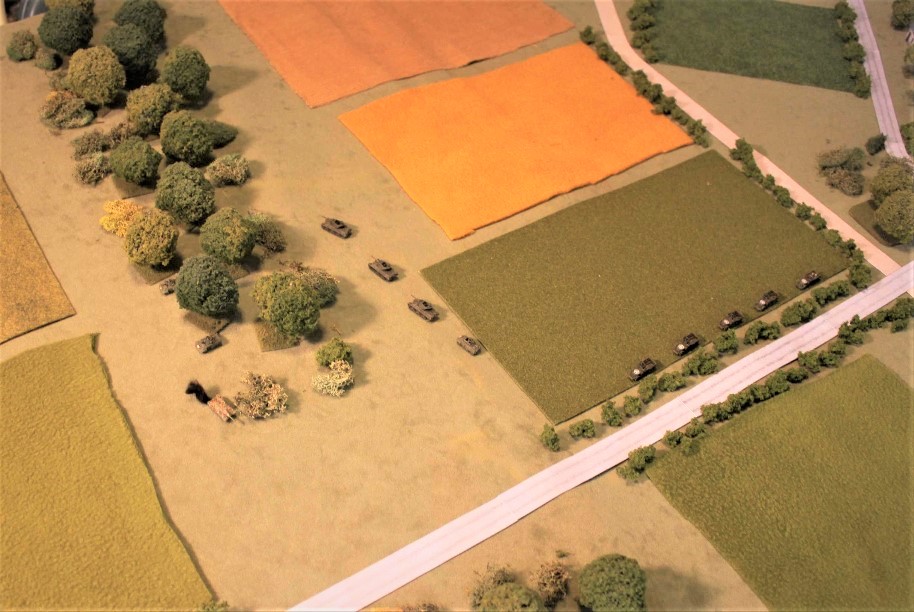
The Germans are defending from the center tree line which is on a low ridge back to the top of the picture, which is East. The Americans come onto the table from the bottom (the West) using the center hard surfaced road as their avenue of advance. They need to exit off the far end of the table as quickly as possible.

49835343037_c1742a66ef_o.jpg


German Deployment

49835342722_a830a4e493_o.jpg


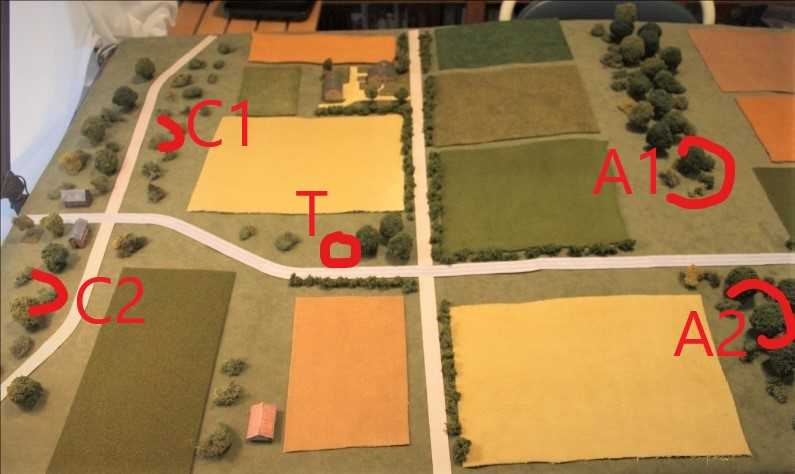
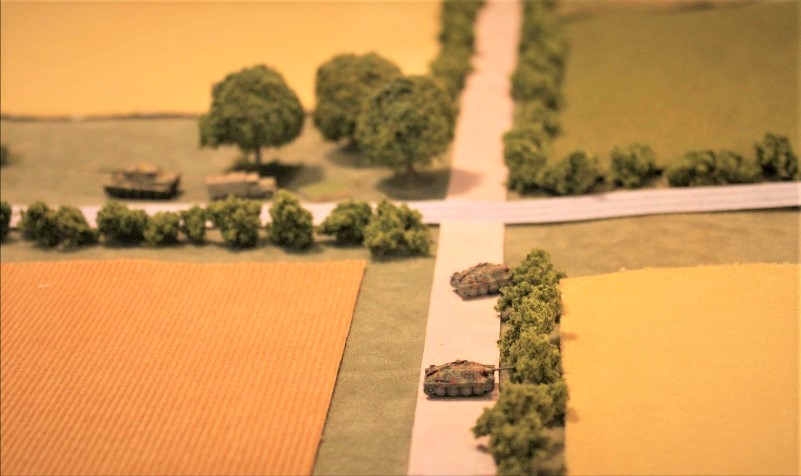
A1 and A2 are where the Hetzers were deployed, a pair on each side of the main road in the woods.


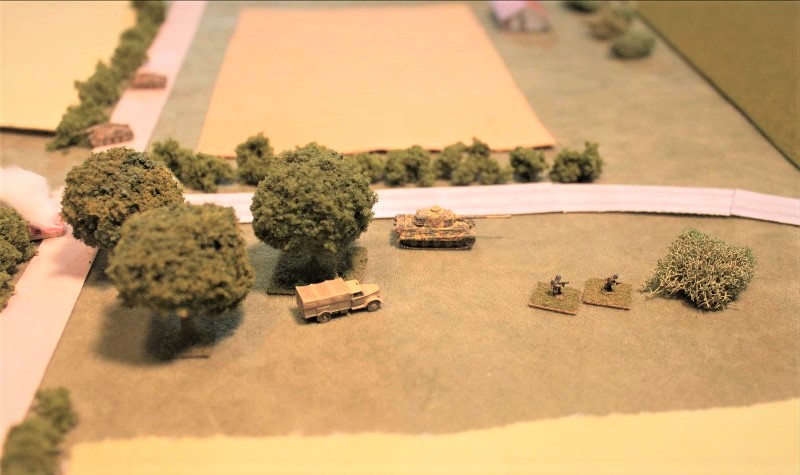
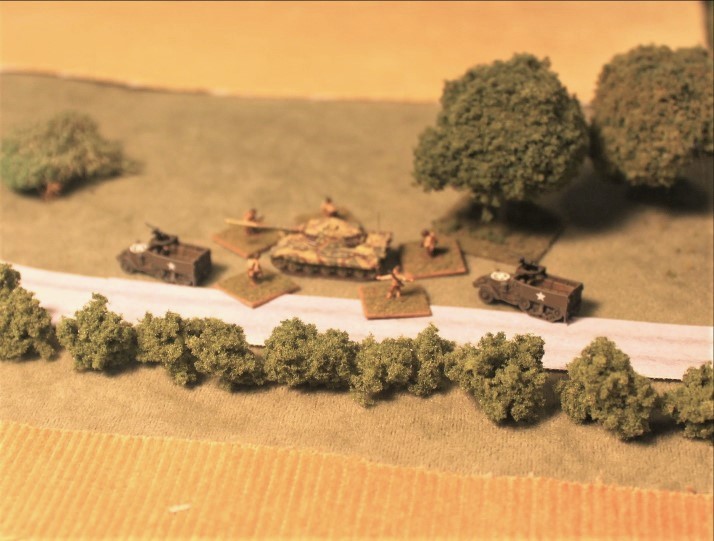
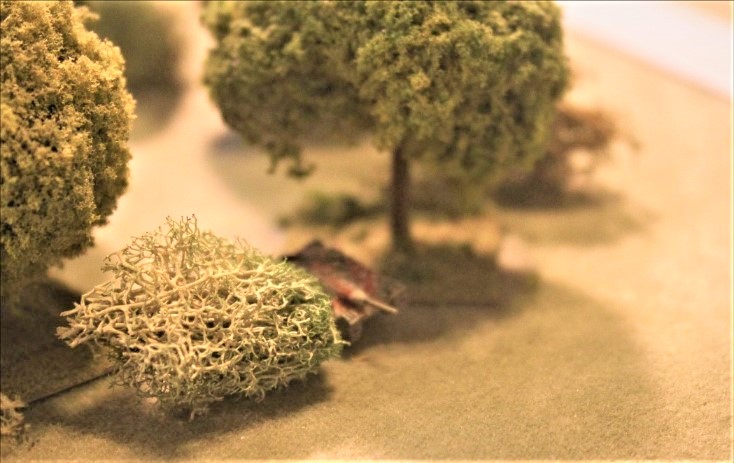
T is where the Tiger is positioned, behind the copse of trees and off the road. One squad of infantry is with the Tiger to provide security for the crew and mechanics.


C1 and C2 are where the AT guns have been placed. Each has an infantry squad for security.


The Germans are deployed hidden, with counters placed on the table standing in for the units until they have been spotted. There are some blanks in the mix to increase the American’s uncertainty.


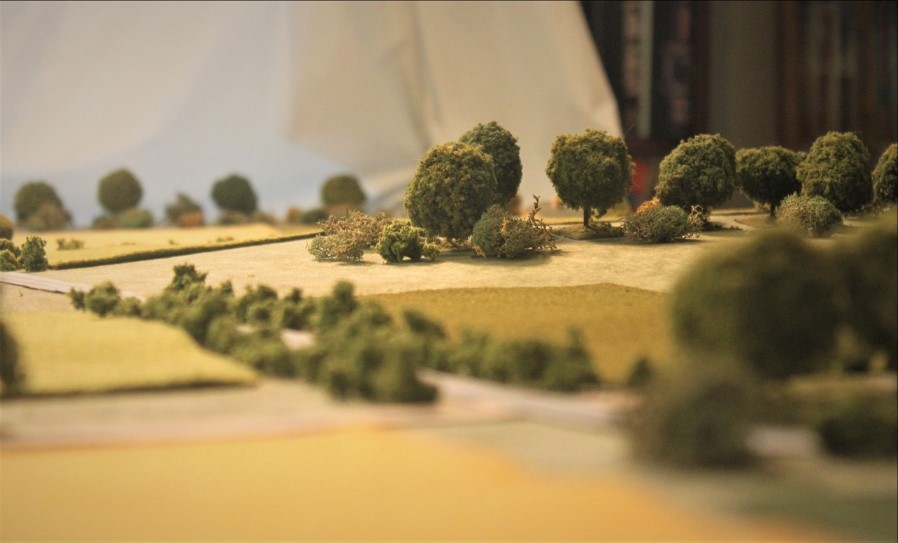
A view of the low ridge from the American perspective, looking east by southeast:

49834500003_57b8378e8b_o.jpg


The Game


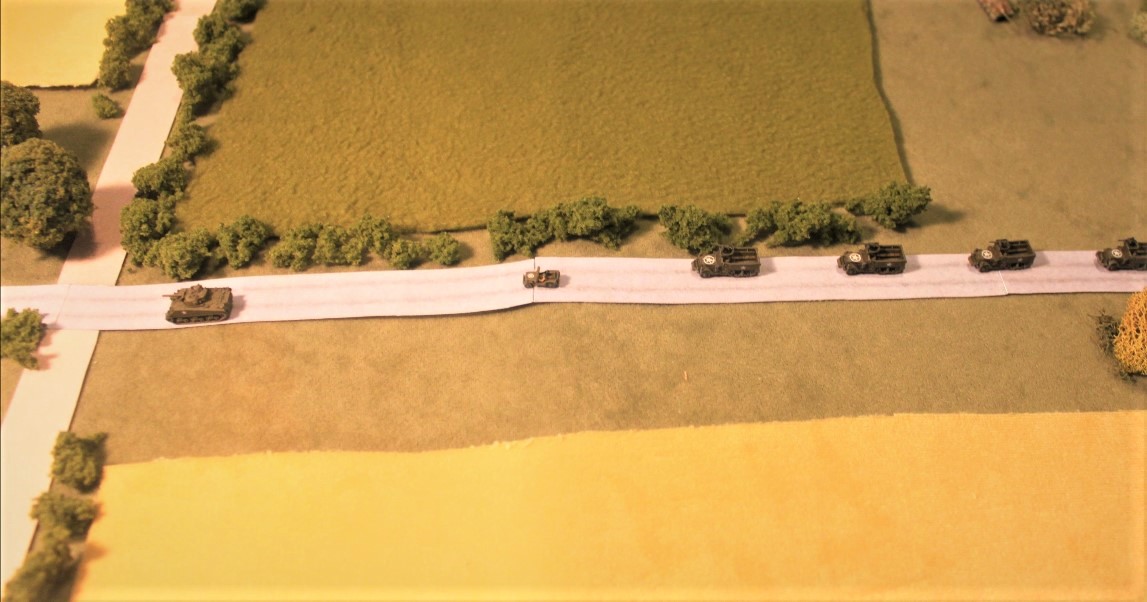
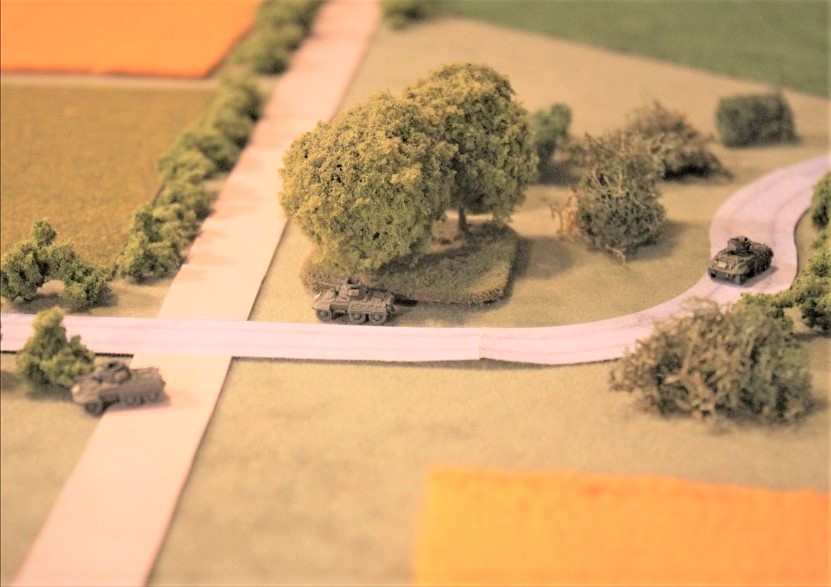
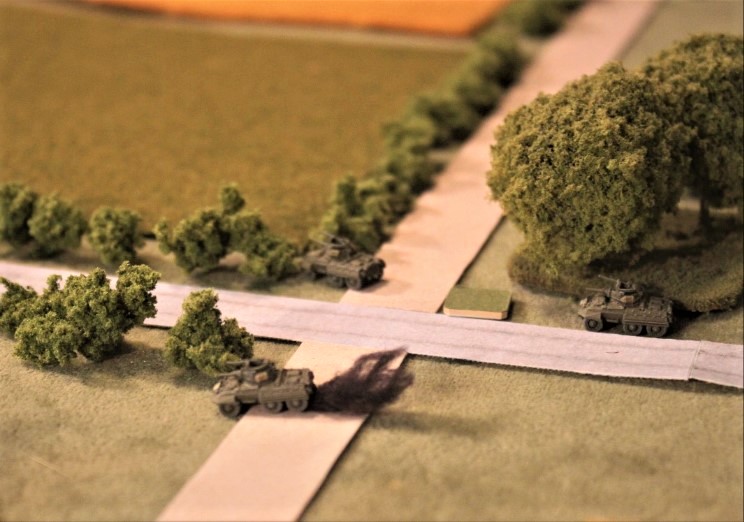
The Americans move onto the table, scouts leading They approach the first crossroads and begin scanning the treeline on the ridge, looking for the enemy.

49834500263_b49be553cf_o.jpg


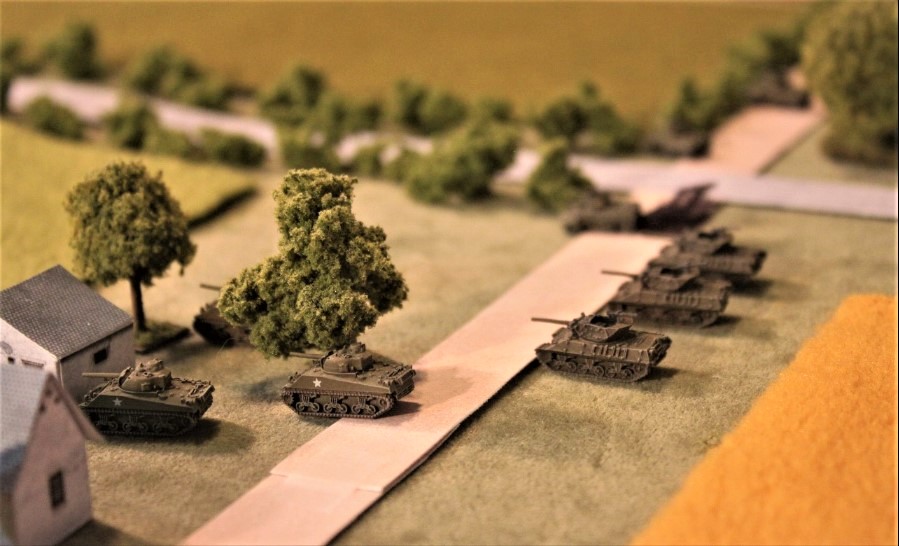
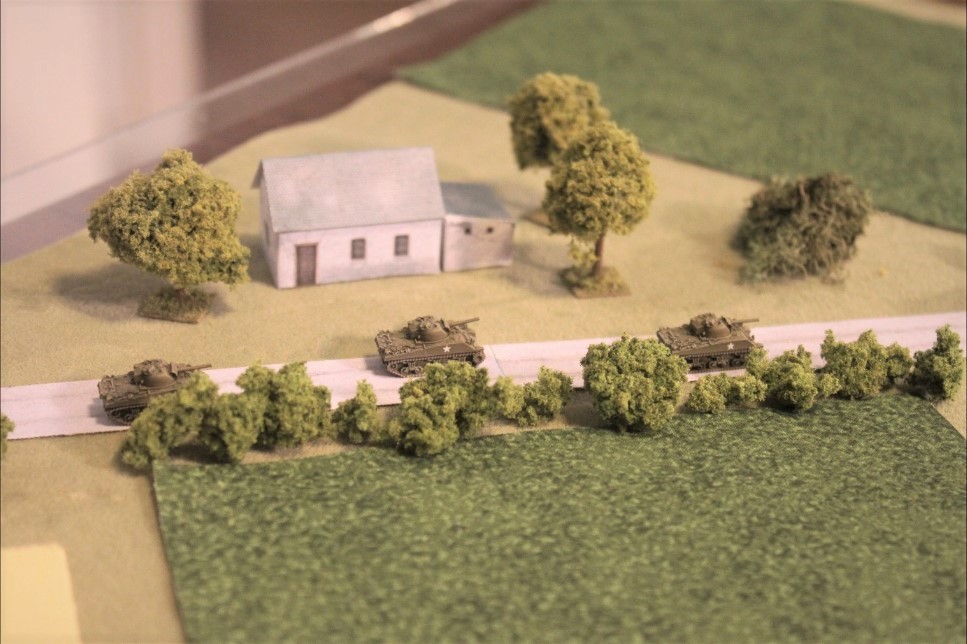
The scouts are followed by the tanks:

49834499928_654d55d20a_o.jpg


The scouts spot a Hetzer in the north woods (position A2)

49835035196_71c60f71ea_o.jpg


… which immediately kills one of the Grayhounds.

49835342957_6b0e572931_o.jpg


The tanks move up to the left of the scouts to engage the Hetzer …

49835342927_09c201e7c7_o.jpg


(continued below ...)


#2 Begemot_

Begemot_

    Private

  • Members
  • 48 posts

Posted 02 July 2020 - 02:27 PM

which has used the time to pull back into the woods to reposition. The tank destroyers also move up to support the tanks.

49835342902_88f0ee3663_o.jpg


Meanwhile, the American halftracks have come onto the table and assume a waiting position on the road:

49834500238_dabe5062ab_o.jpg


With the tank destroyers in overwatch, the Shermans begin the advance across the field. But the Hetzers get a kill,

49835342637_aaf60f2667_o.jpg


with the Sherman brewing up nicely. The Hetzer again pulls back into the woods. Meanwhile the German has been rolling for a 19 or 20 on a D20 to get his Tiger repaired. It isn’t happening.


The American FO is now up and calls down artillery on the north treeline to suppress whatever Germans are in the trees. The surviving Shermans pull back to the farm in their rear, just in case there are more surprises. The two Hetzers in the trees are now pinned by the barrage.

49835342892_d0638eae68_o.jpg


While the shells fall the American commander summons a platoon of infantry forward with the mission to clear the trees.

49835342882_8608ebffd9_o.jpg


With the tanks, tank destroyers and halftracks supporting, the infantry moves out across the field to the trees. As the infantry advances the two Hetzers in the north woods evacuate the trees and begin to fall back to the dirt road to their rear.

49834500168_54b44a863f_o.jpg


The artillery barrage is lifted just before the American infantry reaches the woods and begins to clear the trees. At this moment the scouts, having been visually searching the south trees spot a Hetzer there. The FO calls in a new fire mission and drops artillery all around the spotted Hetzer.

49834500158_728d085512_o.jpg


The American infantry clear the trees, reach the eastern edge of the woods and look down into the valley.

49835342797_21527045e6_o.jpg


And, Behold! There is a Tiger! And a pair of Hetzers behind the hedges in the farm road.

49834500188_43b6972883_o.jpg


With the infantry giving the all clear on the woods the tanks, tank destroyers, and half tracks move forward while the artillery continues to suppress the Hetzer spotted on their right. But not all Hetzers have been accounted for ...

49835035056_14d84a21d2_o.jpg


(continued below … )


#3 Begemot_

Begemot_

    Private

  • Members
  • 48 posts

Posted 02 July 2020 - 02:28 PM

and a second Sherman is killed.

49835342587_22599b65f5_o.jpg


The tank destroyers edge into a better position and take their revenge. This last spotted Hetzer is knocked out.

49835035021_38c92522cc_o.jpg


The killed Hetzer’s companion, having creeped out from under the artillery barrage, is exercising the better part of valor and is falling back to the rear farm road.


The German has not been able to get the Tiger back into operation. With the Hetzers falling back and the Americans now advancing through the woods the decision is made to abandon the Tiger. An attempt is made to destroy the tank in place, but that fails. The mechanics and tank crew load up into the Opel Blitz to dash for the rear. The infantry squad with them decides its chances are better as a small target so they set out on foot.

49835035016_c3943194e9_o.jpg


To cover the withdrawl, the German calls for smoke and is lucky to get a response without delay.

49835342752_e7a2a07a0a_o.jpg


Meanwhile, the American scouts have advanced through the south woods and the tank destroyers are ordered to maneuver south and take up a position to the right of the scouts. The American commander is concerned that he has lost two tanks and has three Hetzers to his front and who knows what else behind them. Maybe maneuvering to the right will give him more advantage than coming straight down the main road. The halftracks waiting back on the main road are ordered up.

49835342572_aea4bc803e_o.jpg


The Opel Blitz, under cover of the smoke makes its dash for the rear. The two scout Grayhounds get fleeting shots at it, but miss and the Blitz blitzes off the table. By this time 15 game turns have elapsed and the German engineers have finished their work at the bridge. The German rear guard has completed its mission. Time to leave.


The Hetzers move back to the trees behind them and the American Grayhounds and tank destroyers cautiously follow.

49834500338_4c03c14c1a_o.jpg


The Germans fade into the woods and disappear. The Americans, sensing their departure, get their people back on the road and continue the pursuit.

49835035296_2c34a2ee68_o.jpg


So while the Germans succeeded in their mission of delaying the Americans, they did lose the Tiger, which becomes a photo op for the Americans.

49835035276_22eba560e0_o.jpg


Results

The Germans lost 1 Hetzer and 1 Tiger, but succeeded in delaying the Americans.


The Americans lost 2 Shermans, 1 Grayhound, captured 1 Tiger, but failed to prevent the Germans from destroying the bridge.


Marginal victory to the Germans.


#4 healey36

healey36

    Lt Colonel

  • Members
  • 744 posts
  • LocationMaryland USA

Posted 02 July 2020 - 03:13 PM

Another nicely thought-out scenario played on a great table. I have found combined-arms operations such as these lend themselves to a lot of variation in the action, especially when including the availability of off-table artillery. This seems a small enough "game" to be played in an evening (presuming the players can be induced to keep going and not dawdle, a chronic problem for me, lol).


Seeing your realistic/simple terrain, has me thinking to chuck mine back in the storage locker and move to your model. Nice ambush scheme on the German armor, BTW.


Nice...thanks for posting.


Healey


#5 Begemot_

Begemot_

    Private

  • Members
  • 48 posts

Posted 03 July 2020 - 04:25 PM

Healy36,


Glad you liked the AAR. Thank you for the kind remarks. My scenario preference is for combined arms situations. Much more interesting and it gives a good test of the rules. 'Mein Panzer' works quite well in these situations and without a lot of burdensome detail.


I did change my approach to table top terrain. In my first AAR posted here, "Bad Day at Byednoye", I was using terrain tiles. They have their virtues, but I wanted a degree of flexibility in terrain set up that tiles would tend to limit. There would be a need for many tiles and that meant expense in time, effort, and material that made me wonder about another approach. I changed to the approach this AAR and the "Clash At The Crossroads" AAR used, terrain based on cloth. This change was inspired by Mark Luther's terrain set ups (if you're not familiar with his approach, view his AARs at the Vislardica site). I've even embraced using paper buildings. The roads on my terrain setups are in fact printed paper glued to gessoed canvas which you can buy in pads, then cut into straights and curves as desired and then taped end-on-end.


Since you liked the cammo on the Hetzers, here is a better photo:


38074490551_f51d2e6629_o.jpg


All my vehicles and figures are GHQ.


Begemot


#6 healey36

healey36

    Lt Colonel

  • Members
  • 744 posts
  • LocationMaryland USA

Posted 03 July 2020 - 07:12 PM

The worst thing about the tile approach is storage. We probably have close to a hundred of them and that takes up a lot of space. We built a couple of racks to store them, but they take a beating. It's not too expensive to make them, but I find them requiring an occasional reflock and/or clean-up. A drop-cloth of an appropriate color along with scenic bits that can be deployed as required has huge advantages. One advantage of the tiles, however, is the ability to build purpose-defined scenes, i.e. ruined towns, bombed out factories, etc.: 


Ruined farm
Ruined factory mod 1a
 
As for paper terrain, it's a bit fiddly to construct, but it works brilliantly on the table. We've used quite a bit of Scott Washburn's stuff for 15mm Napoleonics and ACW, but haven't used any of his 1/285-scale (although I have piles of kits that I bought). Of course, the great advantage of Scott's stuff is it features both a pristine building which is a sleeve over a rubble version. If I go down the path of using the drop-cloth with scenic bits as you do, then I can see busting out the 1/285-scale stuff. I know there's also quite a bit of free paper buildings on the GHQ site as well.
 
As far as the Hetzers go, just a very nice paint job. One of the toughest things for miniature modelers to get is the concept of scale colors, i.e. that colors at a distance don't look like they do out-of-the-bottle. Tinting the color, together with a lot of ink and dry-brushing, will get you the appropriate color variations. This is something I still occasionally struggle with, and I've been at it for quite a long time. The German late-war ambush scheme is very intricate, and to my mind, you've done it extremely well, perhaps the best I've ever seen it done at 1/285.
 
One area I have done a terrible job is painting the fire-teams. You and a few others on here, Mark 1 being another, have done a nice job of painting details on 1/285-scale infantry. Me, not so much. My overspray-with-a-bit-of-dry-brush method leaves a lot to be desired. I need to go back and remedy that.


0 user(s) are reading this topic

0 members, 0 guests, 0 anonymous users